Showing posts with label Desserts. Show all posts

Friday, May 13, 2016

Grunt, Slump or Buckle?


Arkansas strawberries and rhubarb are showing up now in the local Farmer's Markets. May will bring on peaches followed by blueberries then raspberries. My heart is beating faster just writing this! If you love fresh fruit like I do, you can't wait to bake something yummy for dessert that requires a topping of ice cream! Ozark women have been making cobblers since pioneer days. All it takes is a little fruit... fresh, dried or canned and in two shakes of a lambs tail you have a hot bubbly, dessert on the table!

Simmer sweetened dumplings in with juicy berries and you've made a Grunt.

Blueberry Grunt
4 cups blueberries, rinsed and drained
1/3 cup plus 1 tablespoon sugar
1/4 cup light molasses
2 teaspoons grated lemon peel
3 tablespoons lemon juice
1/4 teaspoon ground nutmeg
1/8 teaspoon ground cloves
1 1/2 cups all-purpose flour
2 teaspoons baking powder
1/4 teaspoon salt
3 tablespoons cold butter, cut into chunks
3/4 cup milk
About 1/2 cup whipping cream (optional)
1. In a 10- to 12-inch frying pan over medium heat, frequently stir blueberries, 1/3 cup sugar, molasses, lemon peel, lemon juice, nutmeg, cloves, and 1/2 cup water until the mixture comes to a boil. Reduce heat and simmer gently until the berries have released their juices and the flavors are blended, about 10 minutes.
2. Meanwhile, in a large bowl, mix flour, baking powder, salt, and the remaining 1 tablespoon sugar. With your fingers or a pastry blender, rub or cut the butter into the flour mixture until coarse crumbs form. Add the milk and stir just until mixture forms a soft dough (do not overmix).
3. Drop 1/4-cup portions of the dough into the simmering fruit mixture. Cover the frying pan and simmer until a wooden skewer inserted in the center of the dumplings comes out clean, about 15 minutes. Spoon the warm dumplings and fruit equally into four bowls and drizzle the portions with cream if desired.
Makes 4 servings

Make a cake with fruit mixed into the batter or spooned on top, finished with a crumble topping and you've made a Buckle!

Blueberry Buckle Coffee Cake
2 cups all-purpose flour
3/4 cup sugar
2 1/2 teaspoons baking powder
3/4 teaspoon salt
1/4 cup shortening
3/4 cup milk
1 egg
2 cups fresh or frozen (thawed and drained) blueberries
Crumb Topping
1/2 cup sugar
1/3 cup all-purpose flour
1/4 cup butter or margarine -- softened
1/2 teaspoon ground cinnamon
Glaze
1/2 cup powdered sugar
1/4 teaspoon vanilla
1-1/2 teaspoons hot water (1-1/2 to 2 teaspoons)
Heat oven to 375º. Grease square pan, 9×9×2 inches, or round pan, 9×1-1/2". Blend flour, sugar, baking powder, salt, shortening, milk and egg; beat 30 seconds. Carefully stir in blueberries. Spread batter in pan; sprinkle with Crumb Topping.
Bake 45 to 50 minutes or until toothpick inserted in center comes out clean. Drizzle with Glaze. Serve warm.
CRUMB TOPPING:
Mix all ingredients until crumbly.
GLAZE:
Mix all ingredients until of drizzling consistency.
Printable Recipe

A Crisp is a baked dessert, the fruit filling covered with a crunchy topping crumbled over the top.

Basic Fruit Crisp
6 cups fruit, peeled and sliced such as Peaches, Apples, Pears, Plumcots, Berries
1/4 cup Dried Cranberries
1/3 cup Sugar
1/2 tablespoon Meyer Lemons juice freshly squeezed
1/2 teaspoon Meyer Lemons zest
1 cup Quick Cooking Oats
1/3 cup Brown Sugar firmly packed
2 tablespoons All-Purpose Flour
1/2 teaspoon Ground Cinnamon
4 tablespoons Butter
Preheat oven to 400 degrees. Grease a 9 inch square or rectangular pan.
In a large bowl, toss fruit with sugar, lemon juice and lemon zest.
Lay fruit into pan and set aside.
Mix together oats, brown sugar, flour, and cinnamon. Cut in butter until mixture resembles small peas.
Sprinkle over fruit mixture and bake approximately 30 minutes or until bubbly and crisp. Serves 6
Printable Recipe

To make a Slump, drop the dough over the fruit and cook on the stove top!

Stone Fruit Slump
Filling
4-1/2 pounds mixed plums, nectarines, or peaches, fresh or frozen, pitted
(8 to 9 cups or 3 pounds prepped), see cook's notes
3/4 to 1 cup granulated sugar
3 tablespoons cornstarch
1/2 teaspoon salt
2 tablespoons freshly squeezed lemon juice
Dumplings
1 cup (5 ounces) all-purpose flour
1/2 cup unsifted (2 1/2 ounces) cake flour
2 tablespoons granulated sugar
1 teaspoon baking powder
1/2 teaspoon baking soda
1/2 teaspoon salt
1/2 teaspoon ground cinnamon
1/2 teaspoon ground cardamom
1/2 cup (4 ounces) cold unsalted butter, cut into 1/2-inch cubes
1 cup cold buttermilk
To peel peaches, drop in boiling water for 30 seconds, then pull off peel. They may need a little more time in the boiling water if they aren't good-and-ripe. Or instead of peeling peaches, try washing them well and then piercing them gently with a fork. Once they are slices and baked, the peel will fall apart into the fruit and add a rosy color to the dessert.
1. Prepare fruit filling: Slice fruit over bowl so you can collect all juices. Slice each fruit into 10 or 12 pieces, depending on size of the fruit and drop the slices into the bowl. Separately, rub sugar, cornstarch and salt together in small bowl, then add to the fruit and gently toss to coat. Gently stir in lemon juice, then scrape the fruit and juices into a 10- to 12-inch nonreactive, deep skillet or a wide 5-quart saucepan or Dutch oven. Whatever pan you choose, it must have a tight-fitting lid. Let stand for 15 minutes. During this time, the fruit will release some of its juices and the sugar will begin to dissolve.
2. Bring fruit mixture to a low simmer over medium-low heat. You will need to stir occasionally to prevent the juice from sticking to the bottom of the pan, but do so gently to avoid breaking down the pieces of fruit. Simmer for about 2 minutes, until slightly thickened. Remove from heat.
3. Prepare dumplings: Whisk the flours, sugar, baking powder, baking soda, salt, cinnamon and cardamom together in a bowl. Add butter and toss until evenly coated. Using your fingertips or pastry blender, cut in the butter (until butter is the size of peas). Add buttermilk and stir just until mixture comes together; it will be a slightly wet dough.
4. In eight portions, place dough atop fruit, distributing the dumplings evenly over the surface. Return to the stovetop and bring to a gentle simmer over low heat. Cover with a tight-fitting lid and continue simmering for 18 to 22 minutes or until dumplings are puffy and cooked through to the center. Remove cover and let cool for 15 minutes before serving. Sadly, slumps do not keep well. Serve immediately.
Serves 8
Printable Recipe

These are from an old War Eagle Mill Cookbook...

Apricot Patty Cake Cobbler
3/4 to 1 1/4 cups packed powdered sugar
1/4 tsp. ground mace or nutmeg
3/4 tsp. almond extract
1/2 tsp. grated orange peel
6 cups apricot quarters (about 2 lb. whole fruit)
Patty cake crust (recipe follows)
In a large bowl, combine sugar, mace, almond extract and orange peel. Add apricots and mix. If the apricots are firm and underripe, they will require the maximum amount of sugar. If the apricots are ripe and sweet, start with 3/4 cup sugar. Scrape mixture into a buttered shallow 1 1/2 to 2 quart casserole and spread level.
With lightly floured hands, tear off lumps (3 to 4 T. size) of the patty cake crust and pat into cakes about 1/4 inch thick; lay them as shaped over the fruit, covering fairly evenly (a few gaps are fine). When all the dough is in place, press down lightly to join portions.
Bake cobbler in a 375 degree oven until fruit is bubbling and crust is well browned, 50 to 60 minutes. If using a 1 1/2 quart casserole, set on a large sheet of foil in case mixture boils over. Let stand at least 10 minutes or until cool. Scoop fruit and crust into bowls, adding more sugar to taste if needed.
Patty Cake Crust
In a food processor or bowl, combine 1 cup flour, 6 t. butter cut into thin slices, 1/4 cup cream cheese (2 oz.), cut into small pieces; 1/2 tsp. grated orange peel; and 1/4 tsp. ground mace. Whirl or rub with your fingers until mixture forms fine crumbs. Add 1 large egg yolk and whirl or stir until dough holds together. Press into a ball.
Printable Recipe


Creeping Apple Cobbler
5 lg. apples, peeled and cored
1 1/2 cup sugar
1/2 teas. ground cinnamon
1/2 cup (1 stick) unsalted butter, melted & cooled to room temp.
1 cup all purpose flour
1 teas. baking powder
3/4 cup milk
Adjust oven rack to middle and preheat overn to 375º.
Fit processor with slicing disk. Cut apples in half; fit them in the feed tube and slice. Remove apples to a large bowl. Add 1/2 cup sugar and the cinnamon and toss until well blended.
With a pastry brush, coat the sides of 9 x 12 shallow baking dish with some of the melted butter. Pour the remaining butter into the dish and tilt it back and forth until its bottom is completely covered with the butter.
Sift together the flour, 1 cup sugar and baking powder into a medium. size bowl. With a wooden spoon beat in the milk until you have a smooth batter. Pour the batter into the butter coated dish. Sprinkle the apples, as well as the juice that will have accumulated, evenly over the batter.
Bake the cobbler 35 to 45 minutes or until the top is deep golden brown.
Yield: serves 6-8
As the cobbler bakes, the batter rises and literally creeps up through the apple slices.
Printable Recipe

Peach Crumb Cobbler
5 cup sliced peaches
1/3 cup pack brown sugar
3 tbs flour
1 tsp cinnamon, or to taste
1 cup flour
1 cup sugar
1/2 nutmeg
1 tsp baking powder
1/4 tsp salt
1/2 cup melted butter
1 egg, beaten.
Combine brown sugar flour & cinnamon.
Toss with peaches & arrange in 7x11 pan (9x9 works just fine too)
Take topping dry ingredients, sift... add egg & mix until crumbly.
Sprinkle over filling. Drizzle butter over top.
Bake at 375 for 55 minutes.
Serves 6 big servings
Printable Recipe

Have a good weekend and make some memories!

Friday, May 6, 2016

The Power of Pie


Mother's Day, what better reason than to celebrate with an extra special pie, made to measure for the person receiving it! Meant to say I Love You and you mean the world to me... and then it came to me, The Power of Pie. From the time we are little, at our Mother's knees, we can remember the occasion of pie coming out of the oven. Made just for us, with love, in all it's flaky goodness and chocolate creaminess with whipped cream clouds or jewel tones of cherry or berry... pie is good. In fact, pie is great. Make that special person in your life a pie, let it be warm when they walk in the door!


David Letterman's Mom's Strawberry Pie
1 9 inch pie shell -- baked
1/2 pt Strawberries, fresh -- Washed and hulled
1/2 c Granulated sugar
2 tb Cornstarch
3/4 c Orange juice
1/2 ts Red food coloring
Whipped cream
Mix sugar and cornstartch, then add orange juice and food coloring. Cook until clear. Add strawberries to glaze and pour mixture into pie shell. Serve with whipped cream.


Fall Apple Pie
Pie Crust:(Classic Crisco recipe)
This will make a double crust 9" pie
2 cups all purpose flour
1 teaspoon salt
3/4 cup well chilled Crisco Butter Flavor Shortening
(I use the Crisco Sticks - and use 3/4 stick)
4-8 Tablespoons ice cold water
Blend flour and salt in mixing bowl. Cut chilled shortening into cubes into flour mixture using pastry blender until mixture resembles coarse crumbs with pea sized pieces remaining.
Sprinkle 4 Tablespoons of water over mixture and stir with a fork. Add more water by the Tablespoon until dough holds together. It takes about 6-8 Tablespoons for me.
Divide dough in two with one ball slightly larger than the other. At this point, I place back in my mixing bowl (both balls of dough) covered with plastic wrap and chill for 30 minutes. Remove dough from refrigerator and place larger ball of dough onto floured surface. Using floured rolling pin roll dough into a circle until about 2" wider than the pie plate. Ease bottom crust into pie plate and trim evenly around plate. Fill with pie filling (recipe will follow). Roll top pie crust, lift onto filled pie. Trim dough with 3/4" overhand; fold top edge under bottom crust. Press edges together and flute. Cut slits in top crust.
Apple Pie Filling:
8 cups sliced apples (This was 6 large apples for me)
1 cup splenda or regular granulated sugar
3/4 teaspoon cinnamon
1/4 teaspoon nutmeg
1/8 teaspoon salt
3 Tablespoons cornstarch
1 Tablespoon Lemon Juice
Pre-heat oven to375 degrees. Place apples in large bowl. Stir sugar, spices, cornstarch, and lemon juice into apples. Pour apple filling into bottom pie crust. Dot with 1 tablespoon butter (break butter into small pieces all over top of pie filling) and cover with top pie crust. Crimp edges. I normally cover the crust with tinfoil the first 40 minutes of baking, remove foil and continue to bake for 20 minutes more.

Saturday, October 17, 2015

Fried Peach Pies


Grandma Keeling's fried pies were simple, that's not to say that they weren't the most delicious treat that came out of that old kitchen. She was a country cook who used lard and white flour and didn't have to go to the store for everything, they grew most of what they needed. Every morning she put on her apron and made biscuits for Grandpa, he would have thought the world would have come to an end if he didn't have a hot biscuit on his plate alongside his eggs at 7AM! Those biscuits were enjoyed with honey or sorghum or preserves that had been put up over the summer months when their little orchard produced peaches, apples and pears. Grandma also dried the fruits, spreading them out on steel screens that Grandpa fashioned out of old window frames just for this purpose. On special mornings she'd put that little saucepan on the back burner and add some dried peaches in preparation for making her fried pies. As the peaches cooked down the smell of summer filled the kitchen, even if it was the dead of Winter. If you had a Granny who made these for you, I don't have to explain how good they are. If you didn't, you need to make them... just once. Make sure you do it when someone you love is there with you to absorb the goodness♥♥♥

Fried Peach Pies
Filling
6-7 ounces dried fruit (peaches, apples, apricots)
1 cup sugar
2 cups water
1/4 cup butter
1/2 tsp cinnamon
Dough
2 Cups all purpose flour
1 Tsp salt
1/2 C Crisco Grandma used lard
1/2 C of milk
Put the dried fruit in a saucepan and add water. Bring to a boil and reduce heat to simmer until the fruit is tender, about 15 minutes. Add the cinnamon, then mash with a fork. Set aside while you make the dough.Place flour and salt in a bowl and stir together. Cut in the shortening with a fork and add the milk and stir until dough sticks together. Divide into about 8-10 balls. Roll each out on a floured surface, in 5-6" circles. Place 2 tablespoons or so of filling in each. You want them full but not enough that it oozes out. Wet the edges and fold over, crimping with a fork. Cook in oil which has been heated on medium heat, until brown on both sides, turning as needed. Remove to paper towel lined plate.

Stand back and wait for compliments!

Saturday, July 25, 2015

Fried Bologna Sandwich


Every week I have to figure it out, what's for dinner? One day folds into a week, then a month, then summer is gone, fall is here, winter is upon us and springtime arrives. I try to mix it up, we've been having a lot of THIS lately. When we get tired of THAT then we try a little SOMETHING DIFFERENT. I really never know what I'm in the mood for until I wake up and say THIS SOUNDS GOOD!

Are you like that too? There's just some things that sound good in the SUMMER when it's too hot to cook. By the time Fall rolls around I'm thinking of FAMILY FAVORITES. Winter is for COMFORT FOODS, stick to my ribs meals. When I can't face another bowl of stew, then SPRING finally arrives with lighter MEALSWhen life seems flavorless, look for something you haven't had in awhile. All of a sudden it tastes good again, but it's not the food. It's you that changes!

I'd love to have you join us on Facebook's Granny Mountain Group... it's a great way to pass along recipes, tips and ideas that we're all finding at Pinterest or even better... potlucks and family recipe boxes! 


Friday, November 21, 2014

Libby's Favorite Pumpkin Roll

Libby's Favorite Pumpkin Roll


1/4 cup powdered sugar (to sprinkle on towel)
3/4 cup all-purpose flour
1/2 teaspoon baking powder
1/2 teaspoon baking soda
1 tablespoon pumpkin pie spice
1/4 teaspoon salt
3 large eggs
1 teaspoon pure vanilla extract
1 cup granulated sugar
2/3 cup pure pumpkin puree (Libby’s)

For the Filling

1 (8 ounce) package cream cheese, softened
1 cup powdered sugar, sifted
6 tablespoons butter, softened
1 teaspoon vanilla extract
1/4 cup powdered sugar (optional)
Preheat oven to 375 degrees F. Line a 15 x 10-inch jelly-roll pan with parchment paper and spray with non-stick cooking spray, or you can use a Silpat. Sprinkle a clean tea towel with powdered sugar. Set pan and towel aside.
In a medium bowl, combine flour, baking powder, baking soda, pumpkin pie spice and salt. In a large bowl with an electric mixer, beat eggs, vanilla and sugar until thick. Add in pumpkin and mix to combine. Stir in flour mixture. Spread batter evenly into prepared pan.
Bake for 13 to 15 minutes or until top of cake springs back when touched. Immediately loosen and turn cake onto prepared towel. Carefully peel off paper. Roll up cake and towel together, starting with narrow end. Cool on wire rack.
In a medium bowl, beat cream cheese, powdered sugar, butter and vanilla extract until smooth. Carefully unroll cake; remove towel. Spread cream cheese mixture over cake. Re-roll cake. Wrap in Saran wrap and refrigerate at least one hour. 
Store Pumpkin Roll wrapped in Saran Wrap for up to a week in the fridge or you can freeze it and store up to a month. Allow the roll to come to room temperature, about an hour before serving.

Wednesday, January 23, 2013

Southern Supper

Growing up, I didn't ever think of myself as being Southern. We were Midwesterners living in Missouri, the heartland. My Mother's staple meals were meatloaf, roast and yes, we ate a lot of Jello salads! When I'd visit my Grandma just 100 miles to the south, the table was always filled to capacity at mealtimes. In the middle of the table set an assortment of sweet and sour.. honey and sorghum, preserves and jellies, pickles and vinegar. Suppertime was a long, drawn out event that was prepared for and enjoyed. Long after the dishes were cleared, we'd set at the table and talk. I realize now that those conversations turned me into a Southerner. No matter where you go in the south, it's meat and three, plus a salad, rolls, dessert and sweet tea...

North Louisiana Dutch Oven Fried Chicken
A Celebration of the Flavors of the South
Devon O'Day
 
1 (2 to 3 pound) whole fryer, cut into pieces
Shortening or vegetable oil, to fill a cast-iron Dutch oven half full
  2 cups all purpose flour
 2 teaspoons salt, divided
 2 teaspoons pepper, divided
Rinse the chicken pieces and set aside. Heat the shortening or oil in the Dutch oven on high or to about 365 degrees. In a large bowl or brown paper bag, combine the flour, 1 teaspoon of the salt and 1 teaspoon of the pepper. Use the remaining 1 teaspoon salt and 1 teaspoon of pepper to cover each piece of chicken before dredging in flour or shaking to coat in brown paper bag. (Note: Additional salt and pepper, or dry Cajun seasoning, can be used on chicken pieces prior to flouring if a more savory chicken is desired). Make sure each piece of chicken is completely covered in flour. Test the oil to make sure it is hot by dropping a pinch of flour in the skillet. If the flour begins to sizzle, the temperature is right. Gently add all the chicken to the Dutch oven and clamp the lid on, reducing the heat to medium high, which should look like a gentle rolling boil. Check the chicken after about 15 minutes, bringing the bottom pieces to the top, rotating the top pieces to the bottom. At about 25 minutes remove the lid, increase the hit and turn each piece until it becomes a dark golden brown and the juices run clear. Remove each piece with tongs or a large fork and place on a large plate covered with paper towels or brown paper to soak up any excess oil, before moving to a serving platter.


 Lawn Mower Salad
from All Recipes makes 6 servings 

 1/2 cup canola oil 
1/2 cup white sugar 
1/4 cup water 
1/4 cup balsamic vinegar 
2 (3 ounce) packages chicken-flavored ramen noodles, crushed, seasoning packets reserved 
1 (12 ounce) package broccoli coleslaw mix 
1 bunch green onions, sliced 
1 cup roasted cashews 
1/4 cup roasted sunflower seed kernels 

Whisk canola oil, sugar, water, balsamic vinegar, and seasoning packets from ramen noodles in a bowl until thoroughly combined and sugar and seasoning packets have dissolved. Toss ramen noodles in a large salad bowl with broccoli slaw mix and green onions. Pour dressing over the salad and let stand 1/2 hour to 4 hours - shorter for crunchier noodles, longer for softer ones. Just before serving, toss salad again with cashews and sunflower seeds.


Doesn't this look like a great way to get your veges? Three kinds of cheeses and bacon, this is very close to my favorite potato casserole!
 
Grandma's Green Beans and Ham
 
 
1/2 cup chopped country ham (I like a good Arkansas ham like Petit Jean)
1 tablespoon oil
1 1/2 cups water
1 teaspoon sugar
1 teaspoon salt
2 pounds fresh green beans, snapped
 
Brown the ham in the oil in a 3 quart saucepan. Then add the water, sugar, salt and bring to a boil. Add the beans and stir, then cover the pot and reduce the heat. Simmer covered for 25-30 minutes until beans are tender. Makes enough for 6 servings, 3 if they are green bean lovers!


Buttery Cooked Carrots
 
4 cups carrots, cut in 1/2" slices, or baby carrots
1 teaspoon salt
1/2 teaspoon sugar
2 tablespoons butter
3 1/2 cups water
 
Add all the ingredients to saucepan and bring to a boil. Cover and turn heat to low, simmer until carrots are tender about 20-25 minutes.   

Frozen to golden delicious in less than 3 hours. Can you say easy?

 
 Six of One, Plus One of Another Cobbler
A Celebration of the Flavors of the South
Devon O'Day


1 stick butter
 1 cup self-rising flour
1 cup sugar, divided
1 large egg
1 cup evaporated milk
1 tablespoon vanilla or almond extract (almond is especially good with peach cobbler)
1 cup canned fruit, not drained (peaches, cherries, blueberries or blackberries)

Preheat the oven to 350 degrees. Melt the butter in a 2 or 3 inch deep 9 inch square baking dish. In a large bowl, stir together the flour, all of the sugar except one tablespoon, the egg, milk and flavoring, blending well. Pour the mixture into the baking dish over the melted butter. Dump the fruit in the center  of the mixture and swirl it around the dish. (Don’t blend the fruit in entirely, but leave the “swirls” of fruit). Sprinkle the reserved teaspoon of sugar on top of the entire mix and bake for 30 minutes, or until the cobbler is golden on top.
 

Thursday, September 20, 2012

Recycling plants

It's that time of year when the days are getting shorter. When we roll back the clocks in November, winter has set in and we are in for a long season of dreary days. Old Man Winter stays a long time here, coming as early as late September and staying around until early June. Sometimes we think he will NEVER leave! The only way I make it thorough without going crazy, is the hope that houseplants give me! I've already started re-potting some of my summer annuals to bring inside. There are many that do well in a sunny location in your house... impatiens, begonias, spider plants and ferns. You'd be surprised how happy they can make you feel when the days are cold and blustery! One of my favorite houseplants is the Christmas Cactus. It's orchid like blooms put on a show from late November through Christmas.


They come in almost any color... I love the pinks and reds since they bloom at just the right time to add color to my holiday decorating! Easy to care for, they tolerate low light conditions in the house. All summer long I keep mine on our shady patios, other than a little plant food and a spritz of water, they are on their own... summer vacation for them and me! When nights begin to cool, I bring them inside and take away their plant food letting the soil dry between waterings. Until buds start forming, they like low light. I keep mine in the living room. Once the buds start to open, move them to a light location, not direct sun though. Favorite places near windows are perfect... bookcases, bedside tables, mantles, kitchen bars, even on the side of your tub if it's near a window! If you have a cool house, they will bloom for as long as 6 weeks! Once it's finished with it's show, move to a sunny place until summer arrives and it's time for their vacation on the patio!


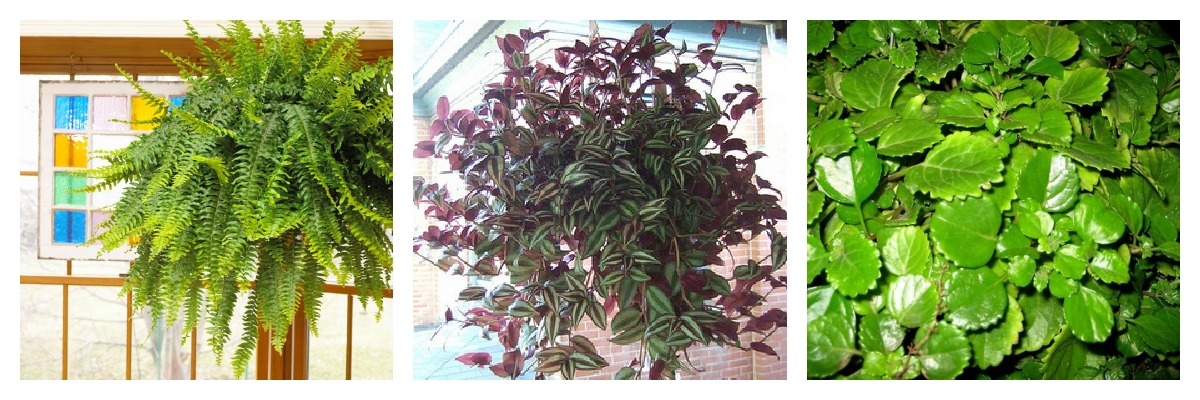
I learned from Mom that summer's annuals can easily be moved indoors and enjoyed, only to recycle the next summer... and the next summer... and the next summer! She moved her ferns, wandering jew and swedish ivy inside every year and enjoyed them all winter long. The ferns set in the coolest part of our house, a foyer that was shut off from the main house with french doors. There was enough light from the rooms that came off of that hallway to keep them in a semi-dormant state all winter long. It must have kept them from doing the leaf drop that mine are prone to each winter. My house is simply too warm so I keep our ferns in the garage. Since it's well insulated, they do just fine.

I love a plant that gives me a plant, the Ivy leafed Geraniums that you may have bought this summer can be "wintered over." They are a trailing plant and by the end of the season are often overgrown and rootbound. You can simply give them a haircut, taking off all but 6-8 inches of growth, then set the pot in a cool place with weekly waterings until early spring. For us, that's March. Then you remove from the pot and slice off the bottom 1/3 of the soil to get the tangle of roots. Divide up into pots of three plants, keep them watered and in a light place until temperatures warm and you can move them outside.
Some of the plants that you can easily propagate are Spider (Chlorophytum comosum), Philodendron and almost any ivy. Just snip, plant and water! 

Hands down, my favorite houseplant is an African violet. Somewhere along the way, African violets got the reputation of being temperamental. Given a bright window and a drink of fertilized water they will fill your home with blooms all year long. I love the lacy white edged purples and the double bloomed plants, they remind me of Mrs. Freeman. She had her collection on a large table near a dining room window, they were the first thing you'd see as you walked into her house on Summit. No matter how much snow was on the ground, those violets were blooming!

I know I'll be glad I moved all those plants inside once the snowflakes start to fall and I'm on the inside more. It will make winter bearable and give me the hope that springtime will come again and I can dig in the dirt! 

Speaking of "dirt," here's a great recipe for Ghosts in the Graveyard Cake. This one is from Kraft Foods and is so easy! You can Make and Take in less than 30 minutes, so SAVE for that emergency dessert that you may be needing in the next few weeks. Click HERE for the recipe!


Thursday, August 23, 2012

Support Local Farmers

The price of eating fresh fruits and vegetables has really gotten out of hand this year, this summer's drought across the nation has put a death grip on costs associated with food production. That not only includes grain of all kinds, but the transportation costs associated with shipping our food to market. From farm to table, it's an expensive process.

One way we can save on costs is buying local. Farmer's Markets are a great way to find the freshest fruits and vegetables in your area and you are helping a farmer with each and every purchase.

Have you seen okra in your grocery store this summer? Me neither. It's almost impossible to buy here unless you know someone who grows it. A southern staple in the summertime, we cut it up and give it a dip in cornmeal before we fry it crispy. Served with fish and cornbread, for those that love it, this is as close to Heaven as you can get!

Late gardens are bringing on a flood of turnips, greens, winter squash, carrots and beets. The great thing about these are their "keeping quality." If you have a cool place to store, they will last for a long time.

Cabbage is another great fall vegetable, taking only 80 days to maturity it can be planted in mild weather states in late summer. A visit to the Farmer's Co-op to pick up a tray of fall seedlings will give you the head start you need to keep that garden going! Fall really is the best time to plant.

I came across this great idea the other day on Vegetable Gardener... growing a hill of potatoes in laundry baskets from the Dollar Store! Yes, this does work and it produces about 8-10 pounds per basket. You simply add soil, seed potatoes and then keep topping it off each week with more soil as they grow. Some people say they lined the basket with straw or burlap and that helped keep the soil from coming out the sides. 

Earlier this spring, we were having a problem with black tree ants. I noticed greater numbers outside on the patios, then on the decks and one day they had somehow found their way into the house. At first only one or two crawling across the carpet. I know it only takes a small crack for a bug to enter your home, so I began my search. In no time, I saw a large number of them in the upstairs windowsill. It was closed and locked but somehow they were getting in. I had a spray and used it along the sill, that killed the ones there in no time. But what about the great numbers I was seeing outside under the oak trees? 

A quick call to Richard at the Farmer's Co-op and he had a solution for me. Diatomaceous Earth. Ever heard of it? It's actually a natural product from the ocean.


The fine powder absorbs lipids from the waxy outer layer of the insects' exoskeleton, causing them to dehydrate. They die in a very short time, usually hours after application. That's exactly what happened after I applied a light dusting around the oak trees where I saw great numbers of the ants. The good news is that Diatomaceous Earth was poison free, pets coming in contact with the powder couldn't get sick. In fact they could actually lick it and it would work the same magic on intestinal pests! Watch the video and you will be amazed at this natural occurring marine settlement that's beneficial for so many uses!

One more thing you may want to add to your fall planting list is garlic. Simple and easy to grow, you probably have everything you need in the kitchen right now! That is, if you cook with fresh garlic. It's convenient to have the bottle of minced garlic in the fridge, but nothing tastes as good as fresh in my opinion. The bulbs I buy in the produce section last for a a good month, maybe longer. That's pretty good for shelf life! But having some growing in a sunny place in your yard is even better. Mother Earth News says planting garlic in the fall produces full sized bulbs that have more flavor. About a month before the ground freezes, place the single cloves of garlic in a sunny part of your garden, about 2" deep. Mulch well and then let Mother Nature slowly grow you a bumper crop of garlic!

It was 57 degrees at my house this morning, cool enough to get me thinking about fall desserts! I found this great recipe on Pinterest this week and it's making the trip to Texas with me... I bet it will be a big hit with my kids!

Pumpkin Cheesecake Bars
2 cups crushed gingersnap crumbs
4 tablespoons butter, melted
2 (8oz) packages of cream cheese, softened
1/3 cup sugar
1/3 cup sour cream
1 teaspoon of vanilla
2 large eggs
1 cup pumpkin puree
1 teaspoon cinnamon
1/2 teaspoon ground nutmeg
1/4 teaspoon ground cloves
1/4 cup brown sugar
1/2 cup all purpose flour
1/4 cup cold unsalted butter cut into pieces
caramel sauce
Preheat oven to 400 degrees. Line a 8″x8″ glass pan with foil, be sure to cover the sides, you are going to use this to lift the cheesecake out of the pan.
Combine the melted butter and gingersnap crumbs and press into the bottom of the pan. Cook for 10 minutes. Remove and set aside.
In a bowl beat softened cream cheese until smooth. Beat in sugar, sour cream, vanilla, eggs, pumpkin, cinnamon, nutmeg and cloves. Beat until smooth and creamy. Note: if you end up with lumps you can transfer the mix to a food processor and pulse a couple of times until smooth.
Pour mixture onto gingersnap crust.
In another bowl combine flour and brown sugar. Using a pastry cutter cut cold butter into the mixture until crumbly.
Sprinkle mixture over the top of the cheesecake. Bake for 40 – 50 minutes or until the center is set. If a knife inserted comes out mostly clean you are good to go.
Allow to cool on a cooling rack for about 40 minutes. Cover and refrigerate until chilled through, about 2 hours. Cut, drizzle with caramel sauce and serve.


Thursday, July 5, 2012

Creepy Crawlies

Good morning, I hope everyone had a safe and fun 4th of July! With the temperatures in the upper 90's, we stayed inside in the cool until late in the day and then went out for a moonlight boat ride. It's my favorite time to be out on the lake, sometimes we don't see a soul and it's very relaxing to just putt-putt-putt up the coves. 

We head off before sunset, leaving Prairie Creek Cove and heading up the lake. Looking back West toward the house, the sun melts slowly into the water.

We leave a light on at the boat dock but after many rides we know our way around even in the dark.

Prairie Creek Marina looks like a little City, all aglow. The store and gas pumps are closed but you can still stop and have dinner at the floating cafe.

We head East toward the Highway 12 Bridge, puttering along as we listen to the radio. Music has a way of transporting you back to other years and memories. We talk about the day and allow ourselves to relax and just enjoy the cool night air and the calming effects of being on the lake.

As much as we love lake living, there's a price we pay for being in the boondocks! Last Sunday night we were sitting in the living room watching TV, when out of the corner of my eye I see an itty bitty black spider run across the floor. We rarely see a bug indoors, but there are plenty outside in our woods. I was reading that the extreme heat and drought has caused ants, spiders and roaches to try to join us inside for some relief from the sweltering days. It only takes the smallest crack or crevice for them to gain entry, once inside they find a nice dark closet to take up housekeeping. If you find a little cobweb somewhere when you're cleaning... then you have a spider in the house!

If you're a gardener, you probably have seen these big spiders many times. I overcame my fear from seeing them so often in Grandma's garden. She would walk around the big web, leaving the spider to do her work... which was to devour the many bugs that were a nuisance. She was a welcome addition to the garden rather than a threat. 

Most of us come across a spider or two every time we move something in the shed or garage. They choose someplace where they can be hidden to spin their web, catch tasty flies and other buggies that make the mistake of getting too close. Unfortunately, in Arkansas some of the commonly found spiders are not just a scary sight but also dangerous. The Brown Recluse and Black Widow spiders are non aggressive, but if threatened they will bite. The venom from either spider will cause a painful skin infection, wasting away of tissue and in extreme cases even death. Many bites come from clothing or a towel that's harboring the spider. Be sure and shake out clothing that's been stored or a beach towel that may have been hung on the deck railing to dry. I know I've accidentally carried in a spider that way and just happen to see it as I'm folding the towel. It goes unsaid that having clothes piled anywhere is not a good idea. Outside, make sure you cut back shrubs and bushes near the exterior of your house and have a scheduled time plan to spray for bugs. The Farmer's Co-op recommend BayerTempo, Bifen and Viper products. They also carry spider traps that work very well.        

Every summer, it begins to get away from me... the days zip by and I just can't seem to fit it all in! If you still haven't planted anything, it's not too late. As long as you keep newly planted trees, shrubs and plants watered, now is a good time to get something growing! If you never plant that peach tree, you'll never know how good this cake would be with your own fresh peaches...


¼ cup butter 
½ cup packed brown sugar
1 ½ - 2 cups sliced, pitted and peeled peaches or frozen unsweetened peach slices, thawed and large slices cut in half lengthwise
1 ¼ cups all-purpose flour
1 ¼ teaspoons baking powder
¼ teaspoon salt
½ cup butter, softened 
¾ cup granulated sugar
1 egg
1 teaspoon vanilla
½ cup milk
directions

Place 1/4 cup butter in an 8x8x2-inch baking pan. Warm in a 350 degrees F oven about 5 minutes or until butter is melted. (Be sure to watch carefully to avoid overbrowning the butter). Remove pan from oven. Add brown sugar, stirring until sugar is completely moistened. Spread sugar mixture evenly in pan. Arrange peach slices evenly over brown sugar mixture. Set aside.

In a medium bowl, combine the flour, baking powder and salt; set aside. In a large bowl, beat 1/2 cup butter with an electric mixer on medium to high speed for 30 seconds. Beat in granulated sugar until well combined. Add egg and vanilla, beating until combined. Alternately add the flour mixture and milk to beaten butter mixture, beating on low speed after each addition just until combined. Spread batter evenly over the peaches in the pan.

Bake for 45 to 50 minutes or until a wooden toothpick inserted near the center comes out clean. Cool in pan on wire rack for 5 minutes. Loosen cake from sides of pan; invert onto a large serving plate. Cool for 10 to 15 minutes more. Serve warm. Makes 8 servings


Related Posts Plugin for WordPress, Blogger...